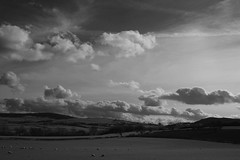
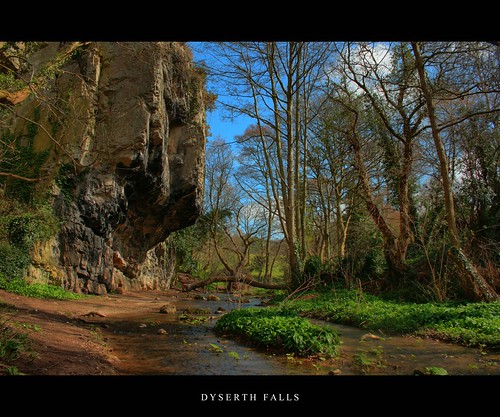
High Dynamic Range - It's a bit like Marmite, you either love it hate it.
HDR often gets a bad press and to be honest when someone mentions HDR we all think of those over processed, grungy cartoon like images. Well, it doesn't always have to be like that, in fact, a lot of images you see everyday are most likely created using HDR techniques.
So for those of you who don't like HDR, have never tried to create an HDR image or are just plain curious please read on. This is a short and sweet explanation of why HDR can be a good process to use to get the most of your images. (Disclaimer - I'm not an expert. This is just from experience)
Why HDR ? High Dynamic Range is a process used to obtain more information from a scene than the camera is capable of in one shot. Our eyes are much better than the camera lens/sensor at seeing all of the tonal ranges in a scene. The fact that we can increase and decrease our pupils to suit the brightness of a scene means that we can take in a dynamic range of upto 24 stops. However, that amount of stops is only achievable because our pupils constantly change size as we look around a scene. The camera does not have that capability when taking a single image.
If we were to look at a scene with our eyes and kept our pupils at a fixed size the dynamic range reduces to around 10-14 stops. Most current DSLR's can capture 8-11 stops so now there isn't that much of a difference between our eyes and the cameras eye. The challenge is how to capture those 24 stops ? (or enough stops to show off everything in the scene.)
In order for the camera to mimic our pupils we need to capture over and under exposed images as well as the correct (or middle) image. This isn't limited to 3 shots though, some people take upto 9 shots (-4,-3,-2,-1,0,1,2,3,4).
If you take a typical landscape scene were you have land (foreground) at the bottom of the scene and sky (background) at the top it is difficult to expose for both in the one shot. If you expose for the sky your foreground will be too dark and if you expose for the land your sky will be blown out. So why not just use a grad filter or sort it in Photoshop later !
Well, there are a number of ways to address this issue. Some processes make use of much more data than others and this is why some processes work well and others not so well. If you take your landscape shot using a grad filter you'll get the exposure balanced right in camera but then all of the data you get to process will be captured in one single file. If you take a number of shots (HDR) then you have a a lot more data to play with (especially if you are 32bit)
HDR is one method you can use to capture the required range of stops. As mentioned at the start, it doesn't have to be a grungy cartoon image but simply processed enough to pull the required detail out in the right places. It doesn't have to be 9 shots either, 3 will do...and in some cases only 1 !
Ok, so how can I do a HDR image with one shot ? Well technically not HDR but if you take 3 bracketed shots of a scene at say -1,0 and +1 then open up the middle image in Camera Raw (assuming you are shooting raw and with a Canon). Now take the exposure slider and move it one stop over and one stop under. Did either the shadows or highlights blow out when you did that ? If not, then you have all of the dynamic range detail that you need in the one shot, you don't need the -1 or the +1. You just need to use the Raw tools to bring out the detail where you need it. That's something to bear in mind as anything that reduces the amount of work you need to do on an image is a big bonus.
So, back to HDR. Now that you have your set of bracketed images, load them up into your choice of software and use the presets and sliders in a way that gets all of the required detail correctly exposed but without turning into a cartoon. Using the sliders correctly will allow you to get all of the required detail out of the highlights and shadows. In the landscape example you should be able to get a good balance between your foreground (land) and background (sky) as you would if you were using a grad filter.
I hope this has been of use to you. If not, well you managed to get this far so something must have kept your attention :-)
Saturday, 20 April 2013
Saturday, 18 August 2012
"Great Expectations"
PC on, Chrome fired up, Google Maps, Paris, street view, various locations......I did this for about a month ahead of the Welshot Paris "All Night Photo Shoot" with Will Cheung FRPS held earlier this month. I also spent hours trawling through "Paris" tagged pictures on 500px and flickr to get myself fired up for the trip.
Doing the research was great because it made me feel more familiar with the environment we would be working in and it also helped inspire and motivate me to think hard about the shots I really wanted to get.
Then of course there is the downside. This is when you start finding some truly great pictures or start looking through work by some of the masters such as Cartier-Bresson. It's so easy to look at other peoples work, work which they have taken years to perfect, to then assume that you'll get a bunch of great pictures in just one night.
Ok, so I did have a few ideas about what pictures I wanted to take but I put things into perspective and set my expectations in a way that I knew wouldn't leave me disappointed after the shoot. Then to complicate things it turned out that due to the flight times a few of us would actually have most of Saturday and all of Sunday to shoot as well as the overnighter.
I guess there are a number of things I learned during this trip, mostly to do with photography but I've always believed that the more I get into photography the less my challenges are to do with photography. Does that make sense ?
I'll try and explain...... here are a few of the things that I'm talking about;
Getting from one location to another - Is this dead time while you travel from the arc du triomphe to the Louvre ? No, the streets and the metro are great places to shoot so you should be looking for opportunities all the time. It's the journey as much as the destination that is important.
Distractions - Paying lots of money and spending time away from home are big deals to most people. Add in the thrill of going to a foreign country and visiting such an amazing location and you can easily get distracted. Do you stick to a game plan ? Do you go with whatever takes your eye when you get there ? I guess the point is that there is so much to shoot and so little time. Unless you are focused you are going to be whizzing about all over the place trying to capture everything.
Hurry up and wait - I'm certainly guilty of doing things too quickly. Probably more to do with the above but I often found myself rushing the shot because I wanted to move onto the next one. I guess I felt that time was short and didn't want to hold anyone else up.
Pace yourself - I was awake for 44 hours in total from start to finish. So, on arrival in Paris do I shoot all over the City during the day, then do the night workshop and then continue to shoot through the Sunday ? I'd love that but I knew I had to pace myself. Looking back though I think I got that a bit wrong. If I could do it again I certainly would have done more on both days.
Lounging around outside Notre Dame on Saturday and then again at the Louvre on Sunday certainly helped the tired feet and weary eyes but I know that valuable shooting time was sacrificed. I know I could have done more and got more pictures.
When I was thinking about writing a blog for the Paris trip there were so many aspects of it that I thought it best to break them down into smaller posts. That's why I've just covered these topics here. Things that aren't directly about photography but did have an impact on the number, type and quality of shots I took.
I know this valuable experience will help me with future trips, shoots and projects etc. It has already helped me decide my next project and resurrect one that I failed at earlier in the year.
My next post will be all about the fantastic gang at Welshot and the photography skills I picked up / developed during the Paris trip.
Wednesday, 18 April 2012
Welshot - Snapshot Day, Liverpool - April 15th 2012
On Sunday 15th April 2012 the Welshot Imaging Photographic Academy held a "Snapshot" day to launch the Academy in Liverpool. The event was opened by Will Cheung FRPS, Editor of Advanced Photographer Magazine. Lee Iggulden and Eifion Williams are the driving force behind Welshot and their continued drive, enthusiasm and ambition is an inspiration to all.
As an existing Academy Member I was lucky enough to be asked to help out on the day. I jumped at the chance and thought I'd share my experience here;
I missed the actual start of the Snapshot Day so cannot comment too much on the opening words from Will Cheung FRPS or the session lead by Zoe Richards of Zoe Photography about how to pose your model. However, I do know that Will and Lee would have got everyone fired up for a fun filled day from the moment they arrived. I also know from experience that Zoe would have shared some really useful advice and prepared everyone for the first modules. In fact, I did hear several comments throughout the day about how good Zoe's first session was.
I joined my group on the waterfront in front of the Liver Building where delegates where being put through their creative paces by John Arnold. A variety of techniques were being put to good use and people where certainly being made to think about what they were capturing. I spoke to a few members of the group and they all seemed to be having a good time and picking up useful tips along the way. They were a great bunch and everyone was pitching in with ideas, questions and comments.
Next we were off to the steps of the Cunard Building where Radha was braving the bitterly cold wind while Will Cheung showed us how to photograph her with off-camera flash (Will had a nice warm coat on by the way). Obviously Welshot cannot guarantee the weather but that's all part of the learning experience, you have to deal with what you have and make the most of it. Bright sunshine and freezing wind is not an ideal combination but Will explained how to deal with those sorts of situations.
The group I was with included people of varying experience and it was good to hear advice being shared between the group as well as from Will. This wasn't just about people taking a load of photo's, every delegate was told which settings to use - and why. They were also asking lots of questions about off-camera flash, what to use, when to use it, etc, etc.
The groups moved around a couple of times so we also got to work with Hazel and Beth. Academy Member Tim Charlesworth ensured everything ran like clockwork so delegates got as much time as possible using their cameras. We used off-camera flash again with Beth but opted for natural light and reflectors with Hazel. Again we were adapting to our environment and making best use of the equipment to hand. So, having changeable weather (cloudy/sunny/cloudy/windy/sunny etc) is a must when you are learning because it is never how the text book says it is.
Before the models turned into frozen statues we packed up and headed back to base for some lunch and a well earned drink. The models did a fantastic job in the freezing cold for 3 hours without complaining...troopers all of them.
The atmosphere back in the hotel was very relaxed and although there was all sorts of planning and preparation going on behind the scenes it was kept well hidden and the delegates were left to mix and mingle sharing stories from the morning sessions. Everyone seemed to be getting involved and were keen to get started on the afternoon.
I was working with Welshot Team leader Paul Smith and Will Cheung FRPS helping out with the Studio set-ups. During the morning I moved around with the same group of people whereas in the afternoon I stayed in the same place and so got to meet the rest of the delegates as they passed through.
The Studio set-ups where quite daunting to anyone not familiar with them but Will gave an introduction to each group explaining how everything worked. Each delegate then got some one-to-one time with Will and Paul learning what settings to use and how to get different effects. There is a huge amount to learn when it comes to studio lighting which is why Welshot will be running a "Lighting Academy" in the near future, be sure to check the website for details.
In between Studio lighting work the delegates were also photographing still life which on this occasion was food photography. Welshot Maestro Eifion and Team Leader Peter Hudson were on hand to show delegates various techniques for capturing food & drink. Delegates also got a demonstration of lighting gear from Lastolite where a variety of products were on display.
The next sessions were ran at the same time so delegates had to decide on either a "Lightroom - Benefits of upgrading from v3 to v4" module with John Arnold or a "Life lessons for the Working Professional" with Zoe Richards. I didn't count but it looked like a pretty even split between the two. Both sessions were very informative and interactive with delegates getting involved, asking questions etc. As with all of the modules on the day they provide a "snapshot" of the subject. Welshot run specific modules ranging from Academy evenings to 1-day, 2-day and 5-day workshops on a variety of subjects.
Finally everyone re-grouped in the main room and Lee gave a quick talk on how Academy Members work can be sold and how it is marketed by Welshot. That was followed by a presentation from Will Cheung covering how to get work published in magazines. This was very informative and generated lots of questions.
Then to round off the day there were a few thank-you's for the people who arranged and ran the day as well as some raffle prizes including huge discounts off workshops and magazine subscriptions.
I'm really sorry for the length of this review but if you got this far it was worth it. I certainly enjoyed the day and as with all Welshot events I did learn quite a few things and met lots of great people.
As an existing Academy Member I was lucky enough to be asked to help out on the day. I jumped at the chance and thought I'd share my experience here;
I missed the actual start of the Snapshot Day so cannot comment too much on the opening words from Will Cheung FRPS or the session lead by Zoe Richards of Zoe Photography about how to pose your model. However, I do know that Will and Lee would have got everyone fired up for a fun filled day from the moment they arrived. I also know from experience that Zoe would have shared some really useful advice and prepared everyone for the first modules. In fact, I did hear several comments throughout the day about how good Zoe's first session was.
I joined my group on the waterfront in front of the Liver Building where delegates where being put through their creative paces by John Arnold. A variety of techniques were being put to good use and people where certainly being made to think about what they were capturing. I spoke to a few members of the group and they all seemed to be having a good time and picking up useful tips along the way. They were a great bunch and everyone was pitching in with ideas, questions and comments.
Next we were off to the steps of the Cunard Building where Radha was braving the bitterly cold wind while Will Cheung showed us how to photograph her with off-camera flash (Will had a nice warm coat on by the way). Obviously Welshot cannot guarantee the weather but that's all part of the learning experience, you have to deal with what you have and make the most of it. Bright sunshine and freezing wind is not an ideal combination but Will explained how to deal with those sorts of situations.
The group I was with included people of varying experience and it was good to hear advice being shared between the group as well as from Will. This wasn't just about people taking a load of photo's, every delegate was told which settings to use - and why. They were also asking lots of questions about off-camera flash, what to use, when to use it, etc, etc.
The groups moved around a couple of times so we also got to work with Hazel and Beth. Academy Member Tim Charlesworth ensured everything ran like clockwork so delegates got as much time as possible using their cameras. We used off-camera flash again with Beth but opted for natural light and reflectors with Hazel. Again we were adapting to our environment and making best use of the equipment to hand. So, having changeable weather (cloudy/sunny/cloudy/windy/sunny etc) is a must when you are learning because it is never how the text book says it is.
Before the models turned into frozen statues we packed up and headed back to base for some lunch and a well earned drink. The models did a fantastic job in the freezing cold for 3 hours without complaining...troopers all of them.
The atmosphere back in the hotel was very relaxed and although there was all sorts of planning and preparation going on behind the scenes it was kept well hidden and the delegates were left to mix and mingle sharing stories from the morning sessions. Everyone seemed to be getting involved and were keen to get started on the afternoon.
I was working with Welshot Team leader Paul Smith and Will Cheung FRPS helping out with the Studio set-ups. During the morning I moved around with the same group of people whereas in the afternoon I stayed in the same place and so got to meet the rest of the delegates as they passed through.
The Studio set-ups where quite daunting to anyone not familiar with them but Will gave an introduction to each group explaining how everything worked. Each delegate then got some one-to-one time with Will and Paul learning what settings to use and how to get different effects. There is a huge amount to learn when it comes to studio lighting which is why Welshot will be running a "Lighting Academy" in the near future, be sure to check the website for details.
In between Studio lighting work the delegates were also photographing still life which on this occasion was food photography. Welshot Maestro Eifion and Team Leader Peter Hudson were on hand to show delegates various techniques for capturing food & drink. Delegates also got a demonstration of lighting gear from Lastolite where a variety of products were on display.
The next sessions were ran at the same time so delegates had to decide on either a "Lightroom - Benefits of upgrading from v3 to v4" module with John Arnold or a "Life lessons for the Working Professional" with Zoe Richards. I didn't count but it looked like a pretty even split between the two. Both sessions were very informative and interactive with delegates getting involved, asking questions etc. As with all of the modules on the day they provide a "snapshot" of the subject. Welshot run specific modules ranging from Academy evenings to 1-day, 2-day and 5-day workshops on a variety of subjects.
Finally everyone re-grouped in the main room and Lee gave a quick talk on how Academy Members work can be sold and how it is marketed by Welshot. That was followed by a presentation from Will Cheung covering how to get work published in magazines. This was very informative and generated lots of questions.
Then to round off the day there were a few thank-you's for the people who arranged and ran the day as well as some raffle prizes including huge discounts off workshops and magazine subscriptions.
I'm really sorry for the length of this review but if you got this far it was worth it. I certainly enjoyed the day and as with all Welshot events I did learn quite a few things and met lots of great people.
Monday, 20 February 2012
Project 50 (A journey)
50 pictures, 50 days, 50mm f/1.4 lens.....
That was the target I set myself at the start of the year. I didn't set any other criteria as I wanted to be able to take pictures of absolutely anything. The reason for this was because I wanted this Project to help me better understand what it is I like taking pictures of. I thought that by the end of the Project I would be able to look back on the 50 pictures and see a pattern, trend or genre jump out at me. Oh, and I also wanted a set of nice pictures too !
The 50th day was Sunday, 19th February and I was kind of sad when I posted the final picture up into my flickr set. It was the end of a journey in a number of ways, ok it's not a Project 365 or anything but it's still hard work coming up with a decent image each day. During the project I had fallen behind a few times by either not taking any pictures on a particular day or not liking what I had taken. This was easily fixed though by taking more pictures next time around. In fact, I had a set of reserve images just in case I fell short at the end.
So, here I am with 50 pictures hoping they will direct me towards my next project and narrow down the type of photographs I like taking. This is where it gets confusing so bear with me. The type of photographs I like taking do not appear anywhere in my 50 pictures. That's right, looking through the pictures I can clearly see that something is missing. What I can see though are pictures where I have made use of the flexibility of the 50mm f/1.4 lens. The majority of images have a very shallow depth of field which is used to highlight a specific subject in the picture. Additionally, they are all taken in a way which enabled me to produce a square crop image after post processing. So, the project has confirmed the fact that I love images with a very shallow depth of field. I also like images where a single subject dominates the shot. I also started to play with some processing techniques to help me develop a style. This was really interesting and I have found a couple of areas to work on. You'll notice a number of pictures have been de-saturated but not too much.
People, where are the people ????
I had to turn this thing on it's head to get some answers. Obviously, the type of pictures I like are the ones I didn't take any of ! So how does that make sense ? Simple....."Comfort Zone". Something I need to get out of if I'm going to take my photography any further.
The Project failed in that sense because I didn't set any specific criteria. By leaving the subject completely open I gave myself a back door, a way in which I could just take pictures (half decent ones mind) of anything . So my sub-conscious was at work here making sure that I didn't have to step out of my comfort zone. In fact, when you look at the pictures you'll notice that the vast majority where taken indoors. I guess my sub-conscious didn't want me to get any fresh air or exercise either !
Time to put things right
While the Project was running I was flicking through a few photo magazines and books looking for inspiration for the next Project. It occurred to me that in order to work out my favourite type of photography I had to analyse the type of pictures I like looking at rather than the ones I like taking. The battle with my sub-conscious had started and I was already plotting the next project before this one had finished. I would recommend a couple of books by John Berger; "Ways of seeing" and "About looking". I must admit it took me a while to get into them but there are pennies dropping everywhere.
This thread is going to go off on a huge tangent but I wanted to include this much in the Project 50 update as it demonstrates the kind of thing you can get out of a photo project. Look out for my next blog detailing the new project.
So, back to Project 50
If you are looking for inspiration, a small project to get you out with your camera or just looking to improve your skills then I would strongly recommend doing a project 50 (or similar). The rules are completely up to you so you can get as much or as little out of it. The huge benefit you get is stretching your creativity. Having to come up with a new and unique image every day certainly does that.
I hope you like the images and I guess if you got this far you were able to put up with my ramblings too. I achieved my goals in a round-about sort of way and learnt a lot more about my photography and my comfort zone as well.
Here are a couple of mosaics showing all 50 images. These were created with "Big Huge Labs" on Flickr.
The full set can be found here
That was the target I set myself at the start of the year. I didn't set any other criteria as I wanted to be able to take pictures of absolutely anything. The reason for this was because I wanted this Project to help me better understand what it is I like taking pictures of. I thought that by the end of the Project I would be able to look back on the 50 pictures and see a pattern, trend or genre jump out at me. Oh, and I also wanted a set of nice pictures too !
The 50th day was Sunday, 19th February and I was kind of sad when I posted the final picture up into my flickr set. It was the end of a journey in a number of ways, ok it's not a Project 365 or anything but it's still hard work coming up with a decent image each day. During the project I had fallen behind a few times by either not taking any pictures on a particular day or not liking what I had taken. This was easily fixed though by taking more pictures next time around. In fact, I had a set of reserve images just in case I fell short at the end.
So, here I am with 50 pictures hoping they will direct me towards my next project and narrow down the type of photographs I like taking. This is where it gets confusing so bear with me. The type of photographs I like taking do not appear anywhere in my 50 pictures. That's right, looking through the pictures I can clearly see that something is missing. What I can see though are pictures where I have made use of the flexibility of the 50mm f/1.4 lens. The majority of images have a very shallow depth of field which is used to highlight a specific subject in the picture. Additionally, they are all taken in a way which enabled me to produce a square crop image after post processing. So, the project has confirmed the fact that I love images with a very shallow depth of field. I also like images where a single subject dominates the shot. I also started to play with some processing techniques to help me develop a style. This was really interesting and I have found a couple of areas to work on. You'll notice a number of pictures have been de-saturated but not too much.
People, where are the people ????
I had to turn this thing on it's head to get some answers. Obviously, the type of pictures I like are the ones I didn't take any of ! So how does that make sense ? Simple....."Comfort Zone". Something I need to get out of if I'm going to take my photography any further.
The Project failed in that sense because I didn't set any specific criteria. By leaving the subject completely open I gave myself a back door, a way in which I could just take pictures (half decent ones mind) of anything . So my sub-conscious was at work here making sure that I didn't have to step out of my comfort zone. In fact, when you look at the pictures you'll notice that the vast majority where taken indoors. I guess my sub-conscious didn't want me to get any fresh air or exercise either !
Time to put things right
While the Project was running I was flicking through a few photo magazines and books looking for inspiration for the next Project. It occurred to me that in order to work out my favourite type of photography I had to analyse the type of pictures I like looking at rather than the ones I like taking. The battle with my sub-conscious had started and I was already plotting the next project before this one had finished. I would recommend a couple of books by John Berger; "Ways of seeing" and "About looking". I must admit it took me a while to get into them but there are pennies dropping everywhere.
This thread is going to go off on a huge tangent but I wanted to include this much in the Project 50 update as it demonstrates the kind of thing you can get out of a photo project. Look out for my next blog detailing the new project.
So, back to Project 50
If you are looking for inspiration, a small project to get you out with your camera or just looking to improve your skills then I would strongly recommend doing a project 50 (or similar). The rules are completely up to you so you can get as much or as little out of it. The huge benefit you get is stretching your creativity. Having to come up with a new and unique image every day certainly does that.
I hope you like the images and I guess if you got this far you were able to put up with my ramblings too. I achieved my goals in a round-about sort of way and learnt a lot more about my photography and my comfort zone as well.
Here are a couple of mosaics showing all 50 images. These were created with "Big Huge Labs" on Flickr.
The full set can be found here
Sunday, 12 February 2012
Welshot HDR Workshop - February 2012
On 4th February I went to the Welshot Imaging HDR Workshop in Liverpool. The workshop was open to members and non-members alike. As with all Welshot events numbers were restricted to ensure that we got the most out of the day.
The purpose of the workshop was to show delegates how take architecture shots intended for HDR processing. Obviously there was a session where this was put into practice and the magnificent Liverpool Anglican Cathedral was our location. This was then followed by tuition covering how to process HDR images and included time saving batch processing techniques. A slap up buffet lunch was also provided at the Atlantic Tower Hotel which was our base before and after the shoot at the Cathedral.
The limited numbers for this workshop meant that people could get plenty of one-on-one time with the course leaders. For this particular workshop we had Welshot Pro Eifion Williams and Adrian Wilson of McFade Photography. In addition we were lucky enough to have John Arnold of Photowalkthrough.com also in attendance. As with all Welshot events the course leaders and attendees all pitched in and everyone learnt from each other.
Throughout the day we were looked after by Lee Iggulden who made sure we all got the most out of the day. Lee kept us topped up with tea and coffee as well as arranging transport between the Hotel and Cathedral. Lee even looked after our gear while we were taking pictures in the Cathedral. If you ever meet anyone more passionate about photography than Lee, I would be very surprised.
The day had a great flow to it and lead us through the various steps from location spotting, taking the shots, preparing images for processing, the actual HDR process itself and a batch process to save hours and hours of post-processing time.
Adrian (Mcfade Photography) gave a great presentation at the start of the day which included some fantastic images he has taken. He provided lots of tips covering composition and exposure etc,etc. When we arrived at the Cathedral we then had further tuition covering how to set up our cameras for HDR shooting. Adrian, Eifion and John were all on hand to assist us and made sure everyone was ready to go and capture some great images.
Before we all went off to wander around the Cathedral we were given a challenge. The workbooks provided by Welshot contained some images of the Cathedral taken by Adrian. Our challenge was to find where they were all taken and capture them ourselves. As you can imaging some of these images would be fairly easy to find. The Cathedral is absolutely huge and the vast spaces provide you with an endless supply of ideas. One or two of the images were taken from places which are usually restricted so one of the benefits of attending these workshops is that you get access to those areas. This means you can get the shots that no-one else can.
I thoroughly enjoyed the day and learnt a great deal from a great bunch of people. If you have thought about giving this type of workshop a go but not yet tried then I strongly recommend that you take a look at the Welshot website. Events are added regularly so keep checking every now and then.
If you have never been to the Liverpool Anglican Cathedral I would certainly recommend it, even if you are not into photography. I would also suggest that if you do go make sure you check out the Lady Chapel....amazing.
For more of my images from this workshop please click here
The purpose of the workshop was to show delegates how take architecture shots intended for HDR processing. Obviously there was a session where this was put into practice and the magnificent Liverpool Anglican Cathedral was our location. This was then followed by tuition covering how to process HDR images and included time saving batch processing techniques. A slap up buffet lunch was also provided at the Atlantic Tower Hotel which was our base before and after the shoot at the Cathedral.
The limited numbers for this workshop meant that people could get plenty of one-on-one time with the course leaders. For this particular workshop we had Welshot Pro Eifion Williams and Adrian Wilson of McFade Photography. In addition we were lucky enough to have John Arnold of Photowalkthrough.com also in attendance. As with all Welshot events the course leaders and attendees all pitched in and everyone learnt from each other.
Throughout the day we were looked after by Lee Iggulden who made sure we all got the most out of the day. Lee kept us topped up with tea and coffee as well as arranging transport between the Hotel and Cathedral. Lee even looked after our gear while we were taking pictures in the Cathedral. If you ever meet anyone more passionate about photography than Lee, I would be very surprised.
The day had a great flow to it and lead us through the various steps from location spotting, taking the shots, preparing images for processing, the actual HDR process itself and a batch process to save hours and hours of post-processing time.
Adrian (Mcfade Photography) gave a great presentation at the start of the day which included some fantastic images he has taken. He provided lots of tips covering composition and exposure etc,etc. When we arrived at the Cathedral we then had further tuition covering how to set up our cameras for HDR shooting. Adrian, Eifion and John were all on hand to assist us and made sure everyone was ready to go and capture some great images.
Before we all went off to wander around the Cathedral we were given a challenge. The workbooks provided by Welshot contained some images of the Cathedral taken by Adrian. Our challenge was to find where they were all taken and capture them ourselves. As you can imaging some of these images would be fairly easy to find. The Cathedral is absolutely huge and the vast spaces provide you with an endless supply of ideas. One or two of the images were taken from places which are usually restricted so one of the benefits of attending these workshops is that you get access to those areas. This means you can get the shots that no-one else can.
I thoroughly enjoyed the day and learnt a great deal from a great bunch of people. If you have thought about giving this type of workshop a go but not yet tried then I strongly recommend that you take a look at the Welshot website. Events are added regularly so keep checking every now and then.
If you have never been to the Liverpool Anglican Cathedral I would certainly recommend it, even if you are not into photography. I would also suggest that if you do go make sure you check out the Lady Chapel....amazing.
For more of my images from this workshop please click here
Wednesday, 30 November 2011
Welshot London Weekend - November 2011
I was fortunate enough to attend the recent Welshot Photography weekend held down in London. The event actually started on Friday evening but I got the early morning train to London on Saturday and met the gang in their Hotel at 08:30am.
Once all the introductions were complete we went down to Borough Market (near London Bridge station) where we met the rest of the delegates.
There were five delegates including myself and we were being guided and educated by Eifion Williams of Welshot, John Arnold of Photowalkthrough.com and Will Cheung Editor of Advanced Photographer magazine. We were all being looked after by the amazing Lee Iggulden who made sure we were photographing as much as possible.
We were set a few challenges by the ever creative John Arnold. Challenges for each location, each day and the weekend as a whole were intended to help us focus on specific tasks but we were free to photograph anything we wanted to as well.
Borough Market is a very lively market set indoors & outdoors. It is easy to see why the market is so popular for shoppers and photographers alike. The place offers everything you can think of and we were lucky enough to be there on a particularly busy day. The place is so alive with sights, sounds and smells that you really are spoilt for choice. We had a couple of hours in the market and although I've not seen anyone else’s images I'm sure everyone got some great shots.
The market is great for candid shots of shoppers and traders alike. But with such a wide variety of wares on sale there are plenty of opportunities to get in close and capture the details.
One comment I would make is that the traders work really hard and keep everybody topped up with free samples of food and drink. So, as a courtesy, if you do visit to take pictures please respect them and try not to get in their way. You can always ask if you want a specific shot, the worse they can do is say no.
From Borough market we wandered up to the river and took a breather next to the Golden Hind before jumping on a clipper to take us over to Canary Wharf.
Canary Wharf is a fantastic location for architecture photography but bear in mind that it is private property. We had a couple of hours to go before sunset so armed with a Starbucks for fuel I had a good walk around snapping away before eventually resisting temptation and popping into one of the Pubs for a quick one. We met up again at 4pm for a quick catch up and then set off again to do some more shots in the dark. Now that sun had gone we were able to play with light trails and long exposures etc.
Once we were all exhausted we retired to a local pub for a well earned (and very nice) meal. We also managed a few drinks as well before returning to base for some light drawing. Having found an area dark enough we had a go at making this year’s Welshot Christmas card. John Arnold did a fantastic job with the torch and we soon had all of the wording in the bag. We then retired to the Welshot hotel were John then gave a lesson in merging images in Photoshop. (these guys never stop)
The next morning we all met up at the Welshot Hotel again where we were also met by the lovely Radha Patel (Model) . We then headed off to the famous "Banksy Tunnel". This is actually Leake Street which is located underneath Waterloo Station.
Leake Street is a fantastic location for a model shoot and this is where Welshot had chosen for us to get a lesson in off camera lighting from Will Cheung. As well as the model shoot there was plenty of street art to photograph and even some artists at work.
There was plenty of time for us all to have a couple of goes using the lighting to get photos of Radha as well as getting some shots of the art work and location in general. The Street Artists were a great bunch of guys and didn’t mind us being there at all. They were quite happy for us to watch them and take pictures but I would point out that some don’t want their picture taken. It always helps to have a chat first and get to know people as they were really friendly and allowed us into their space. Had we just started snapping away without any warning then it might have been different.
After several hundred shots the paint fumes were starting to take effect so we waved goodbye to our fantastic Model Radha and then continued with our expedition. The next stop wasn’t that far as the Embankment and London eye were literally across the road. We had a quick 15 minutes at the London eye so we had enough time for a few shots and a refuel.
We then headed along the Embankment which was very busy as there was a huge Christmas Fayre selling all sorts of things, the most popular being mulled wine of course. Our next pit stop was the Skateboard/BMX Park at Southbank. The park was quite busy with skaters, bmx’ers and even a group making a music video. The location provided opportunities for action shots against a backdrop of yet more street art.
From the Skate Park we headed over to Waterloo station and caught the tube up Trafalgar Square. We had around 30-45 minutes here before the light started to fade. It was a great chance for more candid’s as well as architecture shots. Luckily there were no major events being held in the square but there was a smaller demonstration taking place which was another great photo opportunity.
After our fill of shots from Trafalgar Square we then walked across to Covent Garden. This was to be last location for us. Although the light was going fast the place was buzzing and we had time to go and capture shots of the location, shoppers and street entertainers. Eventually I succumbed to temptation and packed the camera away so I could do a bit of shopping. I was then the last one to arrive in the Pub where everyone had met up for a final drink and chat.
Alas, that was the end of the Welshot Weekend in London. I hope that this gives you a good idea of what a Welshot workshop is like. I had a great time meeting new people, learning new things, seeing new places and spending a lot of time talking nothing but photography.
The Welshot gang have helped take a step further on my Photographic journey and the experience has given me a great deal to work on as I try and move my skills forward.
Big thanks to Eifion Williams, John Arnold, Will Cheung, Radha Patel and of course the wonderful Lee Iggulden.
Reference info;
People
http://www.welshotimaging.co.uk/
http://www.photowalkthrough.com/
www.williamcheung.co.uk
www.facebook.com/#!/Radharani.Patel
Locations
www.boroughmarket.org.uk/
www.canarywharf.com/
leakestreet.com/
www.londoneye.com/
en.wikipedia.org/wiki/South_Bank
www.london.gov.uk/priorities/art-culture/trafalgar-square
www.coventgardenlondonuk.com/
Once all the introductions were complete we went down to Borough Market (near London Bridge station) where we met the rest of the delegates.
There were five delegates including myself and we were being guided and educated by Eifion Williams of Welshot, John Arnold of Photowalkthrough.com and Will Cheung Editor of Advanced Photographer magazine. We were all being looked after by the amazing Lee Iggulden who made sure we were photographing as much as possible.
We were set a few challenges by the ever creative John Arnold. Challenges for each location, each day and the weekend as a whole were intended to help us focus on specific tasks but we were free to photograph anything we wanted to as well.
Borough Market is a very lively market set indoors & outdoors. It is easy to see why the market is so popular for shoppers and photographers alike. The place offers everything you can think of and we were lucky enough to be there on a particularly busy day. The place is so alive with sights, sounds and smells that you really are spoilt for choice. We had a couple of hours in the market and although I've not seen anyone else’s images I'm sure everyone got some great shots.
The market is great for candid shots of shoppers and traders alike. But with such a wide variety of wares on sale there are plenty of opportunities to get in close and capture the details.
One comment I would make is that the traders work really hard and keep everybody topped up with free samples of food and drink. So, as a courtesy, if you do visit to take pictures please respect them and try not to get in their way. You can always ask if you want a specific shot, the worse they can do is say no.
From Borough market we wandered up to the river and took a breather next to the Golden Hind before jumping on a clipper to take us over to Canary Wharf.
Canary Wharf is a fantastic location for architecture photography but bear in mind that it is private property. We had a couple of hours to go before sunset so armed with a Starbucks for fuel I had a good walk around snapping away before eventually resisting temptation and popping into one of the Pubs for a quick one. We met up again at 4pm for a quick catch up and then set off again to do some more shots in the dark. Now that sun had gone we were able to play with light trails and long exposures etc.
Once we were all exhausted we retired to a local pub for a well earned (and very nice) meal. We also managed a few drinks as well before returning to base for some light drawing. Having found an area dark enough we had a go at making this year’s Welshot Christmas card. John Arnold did a fantastic job with the torch and we soon had all of the wording in the bag. We then retired to the Welshot hotel were John then gave a lesson in merging images in Photoshop. (these guys never stop)
The next morning we all met up at the Welshot Hotel again where we were also met by the lovely Radha Patel (Model) . We then headed off to the famous "Banksy Tunnel". This is actually Leake Street which is located underneath Waterloo Station.
Leake Street is a fantastic location for a model shoot and this is where Welshot had chosen for us to get a lesson in off camera lighting from Will Cheung. As well as the model shoot there was plenty of street art to photograph and even some artists at work.
There was plenty of time for us all to have a couple of goes using the lighting to get photos of Radha as well as getting some shots of the art work and location in general. The Street Artists were a great bunch of guys and didn’t mind us being there at all. They were quite happy for us to watch them and take pictures but I would point out that some don’t want their picture taken. It always helps to have a chat first and get to know people as they were really friendly and allowed us into their space. Had we just started snapping away without any warning then it might have been different.
After several hundred shots the paint fumes were starting to take effect so we waved goodbye to our fantastic Model Radha and then continued with our expedition. The next stop wasn’t that far as the Embankment and London eye were literally across the road. We had a quick 15 minutes at the London eye so we had enough time for a few shots and a refuel.
We then headed along the Embankment which was very busy as there was a huge Christmas Fayre selling all sorts of things, the most popular being mulled wine of course. Our next pit stop was the Skateboard/BMX Park at Southbank. The park was quite busy with skaters, bmx’ers and even a group making a music video. The location provided opportunities for action shots against a backdrop of yet more street art.
From the Skate Park we headed over to Waterloo station and caught the tube up Trafalgar Square. We had around 30-45 minutes here before the light started to fade. It was a great chance for more candid’s as well as architecture shots. Luckily there were no major events being held in the square but there was a smaller demonstration taking place which was another great photo opportunity.
After our fill of shots from Trafalgar Square we then walked across to Covent Garden. This was to be last location for us. Although the light was going fast the place was buzzing and we had time to go and capture shots of the location, shoppers and street entertainers. Eventually I succumbed to temptation and packed the camera away so I could do a bit of shopping. I was then the last one to arrive in the Pub where everyone had met up for a final drink and chat.
Alas, that was the end of the Welshot Weekend in London. I hope that this gives you a good idea of what a Welshot workshop is like. I had a great time meeting new people, learning new things, seeing new places and spending a lot of time talking nothing but photography.
The Welshot gang have helped take a step further on my Photographic journey and the experience has given me a great deal to work on as I try and move my skills forward.
Big thanks to Eifion Williams, John Arnold, Will Cheung, Radha Patel and of course the wonderful Lee Iggulden.
Reference info;
People
http://www.welshotimaging.co.uk/
http://www.photowalkthrough.com/
www.williamcheung.co.uk
www.facebook.com/#!/Radharani.Patel
Locations
www.boroughmarket.org.uk/
www.canarywharf.com/
leakestreet.com/
www.londoneye.com/
en.wikipedia.org/wiki/South_Bank
www.london.gov.uk/priorities/art-culture/trafalgar-square
www.coventgardenlondonuk.com/
Thursday, 4 August 2011
Welshot Imaging - Promotional Day, Chester UK. 31st July 2011
Love Photography....Join Us
This was the message to the people of Chester on Sunday 31st July 2011. A group of us descended on the City Centre (taking advantage of Race Day) to promote Welshot Imaging. Our numbers consisted of Welshot Team Leaders, Welshot Members, Professional Photographers, Models, Make-up artist and Hair stylist.
We took over the "cross" area of the City from 10am until around 2pm generating lots of crowds and interest as we proceeded to take pictures of 5 stunning models. Several Welshot Members (me included) were given the opportunity to attend the event and as well as take pictures of the models we were being given expert knowledge and guidance from Professional Photographers.
I was lucky enough to get some one-to-one tuition and guidance from Zoe Richards of Zoe Photography based in Liverpool. To get an opportunity like this is fantastic and would not be possible without the hard work and professionalism of Welshot.
We also had Eifion WIlliams (Welshot Professional) and Will Cheung FRPS (editor of Advanced Photographer Magazine) on hand to provide their knowledge and expertise.
After entertaining most of the race-goers as they made their way down to the course we packed up and headed for lunch. Whoever said there is no such thing as a free lunch is a liar. I got to learn from professionals, take pictures of 5 different models, have lunch and meet a bunch of fantastic people all for free.
We finished off the day with a further shoot in Westminster Park. This for me was the icing on the cake as everything I had been learning was falling into place and this session is where I took my best pictures.
There was so much to learn other than just taking pictures I didn't want the day to end. But unfortunately we did have to wrap it up and head home for some post processing.
If you have an interest in Photography then I strongly suggest that you visit the Welshot site to see what they have to offer. As well as the many benefits of being a member you'll have access to a vast array of knowledge and experience. You can do it all on-line via the forums or you can attend the evening sessions held once a month at various locations where you can meet the Welshot gang and other members in person. Then there are the 1-day / 2-day workshops covering specific genres or techniques.
Through the Welshot experience I was able to attend this promotional day for free and I'm sure this will lead to many more opportunities. So, if you love photography....join us.
1st Model - Sarahann Roberts
2nd Model - Jennifer Brook
http://www.welshotimaging.co.uk/
http://www.keithbarlow.co.uk/
This was the message to the people of Chester on Sunday 31st July 2011. A group of us descended on the City Centre (taking advantage of Race Day) to promote Welshot Imaging. Our numbers consisted of Welshot Team Leaders, Welshot Members, Professional Photographers, Models, Make-up artist and Hair stylist.
We took over the "cross" area of the City from 10am until around 2pm generating lots of crowds and interest as we proceeded to take pictures of 5 stunning models. Several Welshot Members (me included) were given the opportunity to attend the event and as well as take pictures of the models we were being given expert knowledge and guidance from Professional Photographers.
I was lucky enough to get some one-to-one tuition and guidance from Zoe Richards of Zoe Photography based in Liverpool. To get an opportunity like this is fantastic and would not be possible without the hard work and professionalism of Welshot.
We also had Eifion WIlliams (Welshot Professional) and Will Cheung FRPS (editor of Advanced Photographer Magazine) on hand to provide their knowledge and expertise.
After entertaining most of the race-goers as they made their way down to the course we packed up and headed for lunch. Whoever said there is no such thing as a free lunch is a liar. I got to learn from professionals, take pictures of 5 different models, have lunch and meet a bunch of fantastic people all for free.
We finished off the day with a further shoot in Westminster Park. This for me was the icing on the cake as everything I had been learning was falling into place and this session is where I took my best pictures.
There was so much to learn other than just taking pictures I didn't want the day to end. But unfortunately we did have to wrap it up and head home for some post processing.
If you have an interest in Photography then I strongly suggest that you visit the Welshot site to see what they have to offer. As well as the many benefits of being a member you'll have access to a vast array of knowledge and experience. You can do it all on-line via the forums or you can attend the evening sessions held once a month at various locations where you can meet the Welshot gang and other members in person. Then there are the 1-day / 2-day workshops covering specific genres or techniques.
Through the Welshot experience I was able to attend this promotional day for free and I'm sure this will lead to many more opportunities. So, if you love photography....join us.
1st Model - Sarahann Roberts
2nd Model - Jennifer Brook
http://www.welshotimaging.co.uk/
http://www.keithbarlow.co.uk/
Monday, 1 August 2011
TPI - Assignment 12
The End.....16 Months on and I now have my diploma. (actually finished in May, just late writing this post)
It's been a worthwhile journey as I have learned so much about photography and about what I want to do as a photographer. The Diploma itself wasn't what I was after it was more about the knowledge and experience I would gain from this process.
When I first started looking at courses there were so many to choose from and some carried academic qualifications officially recognised etc and others didn't. I looked beyond that and went for a course that had the content that appealed to me. The Diploma was an added benefit I guess, however, in the real world I'm not sure flashing my Diploma is going to get me any further than were I am today. The knowledge and experience I have gained not just from the Institute and the course but from my own journey is much more valuable to me.
The final Assignment is an ongoing process with no end date. I have started on the next part of my photographic journey and even though I have learned many things there is one important lesson that stands out above all of them.
No matter what happens in the future I will never improve as a photographer unless I keep taking photographs. Not just any old photographs, I need to focus on my chosen genre and then push myself as hard as I can. Being in my comfort zone isn't going to get me anywhere nor dropping out of my comfort zone now and then either. Each challenge I set myself from this point forward has to be out of my comfort zone and to a further extent than the previous one.
I am working on a set of goals for the next 12-24 months. Once finalised I will post then here and then provide updates. By doing this in public there is more chance I will actually do it :-)
It's been a worthwhile journey as I have learned so much about photography and about what I want to do as a photographer. The Diploma itself wasn't what I was after it was more about the knowledge and experience I would gain from this process.
When I first started looking at courses there were so many to choose from and some carried academic qualifications officially recognised etc and others didn't. I looked beyond that and went for a course that had the content that appealed to me. The Diploma was an added benefit I guess, however, in the real world I'm not sure flashing my Diploma is going to get me any further than were I am today. The knowledge and experience I have gained not just from the Institute and the course but from my own journey is much more valuable to me.
The final Assignment is an ongoing process with no end date. I have started on the next part of my photographic journey and even though I have learned many things there is one important lesson that stands out above all of them.
No matter what happens in the future I will never improve as a photographer unless I keep taking photographs. Not just any old photographs, I need to focus on my chosen genre and then push myself as hard as I can. Being in my comfort zone isn't going to get me anywhere nor dropping out of my comfort zone now and then either. Each challenge I set myself from this point forward has to be out of my comfort zone and to a further extent than the previous one.
I am working on a set of goals for the next 12-24 months. Once finalised I will post then here and then provide updates. By doing this in public there is more chance I will actually do it :-)
Saturday, 7 May 2011
TPI - Assignment 11
This is where I had to put everything I had learned into practice and produce a set of images. The whole process from start to finish. Everything from the initial concept, visualisation, taking the images, processing and then selecting the best ones for a "no holds barred" review.
Ideally I would have liked to have completed a portfolio of Portraits but I knew it would be time consuming getting subjects lined up. (I will do this in the near future). My second choice was Seascapes which was made a lot simpler as I live on the coast. Also, unlike portraits I could go and get the images whenever I wanted. The only factors I had to consider where sunrise/sunset times and the tidal charts.
On reflection, I probably spent more time working on the presentation of the images rather than the actual process of taking the images. I wanted to display my set of images in a consistent way, after all, the images where to be a set and I wanted them to look like that in every possible way. Having said that I actually ended up with five long exposures and one normal exposure. I guess that's down to artistic license !
Having spent so much time learning all of the science and technology of photography it was a welcome break to simply go out and take pictures. I'm not saying that I ignored the "maths" but I think a lot of it is now almost second nature and so not getting in the way. I tried to focus more on aspects such as composition, leading lines, contrast etc. I'm also less trigger happy now, I used to snap away all over the place and come home with hundreds of images to process. Now, with the aid of pre-visualisation, scouting for locations (and knowing where the sun is going to be) I pretty much know exactly what I am going to shoot, therefore, far fewer images to process.
When you are sat in front of your PC post processing hundreds of images it is important to have a good efficient workflow. My process has developed quite a lot while following this course but I'm still hindered by the 80-20 rule, i.e. rejecting the poor images (80%) can be relatively quick but then deciding which of the 20% you are going to keep can take forever. Then there is the dilemma of keeping or deleting the rejects. I have (on several occasions) reviewed previous work and picked out images that were overlooked first time around. (Tip - regularly look through your previous work, it's great to see how much you have improved).
So, you've completed post processing and gone from 100 images to 10 but you only want to showcase 6 of them. "You'll be remembered by your weakest image so it is important that they are all top drawer", this is what I have been telling my self constantly as it is the first thing you will hear when researching "how to create a portfolio". It's great to get into this way of working and I'm quite comfortable now with my workflow and find it easy to discard unwanted images. However, there is a down side. When you spend so much time looking at your images you can start to get bored of them. Sounds strange but its true. By the time I had selected my final 6 images I was starting to doubt myself and the images and even thought about starting over.
This is where your confidence needs a little boost and the quickest way to do this is to have someone else look your images. So, I uploaded a few of them onto flickr and I didn't have to wait long before some positive comments appeared. Simple, problem solved. But as with all photographers you'll never capture the perfect image because once you do you want to get straight back out there and get a better one.
I was (without sounding modest) expecting a decent score as I put a lot of effort into the images and also the write up completed for each one. The 10/10 was very pleasing but again the detailed feedback was much more valuable to me.
The final assignment doesn't require submission but I will be completing it anyway and reporting back on here.
So that's it, I've completed the Photography Institutes' "Professional Photography Course".
Thank you for reading and I hope that you have found this useful.
Keith
Ideally I would have liked to have completed a portfolio of Portraits but I knew it would be time consuming getting subjects lined up. (I will do this in the near future). My second choice was Seascapes which was made a lot simpler as I live on the coast. Also, unlike portraits I could go and get the images whenever I wanted. The only factors I had to consider where sunrise/sunset times and the tidal charts.
On reflection, I probably spent more time working on the presentation of the images rather than the actual process of taking the images. I wanted to display my set of images in a consistent way, after all, the images where to be a set and I wanted them to look like that in every possible way. Having said that I actually ended up with five long exposures and one normal exposure. I guess that's down to artistic license !
Having spent so much time learning all of the science and technology of photography it was a welcome break to simply go out and take pictures. I'm not saying that I ignored the "maths" but I think a lot of it is now almost second nature and so not getting in the way. I tried to focus more on aspects such as composition, leading lines, contrast etc. I'm also less trigger happy now, I used to snap away all over the place and come home with hundreds of images to process. Now, with the aid of pre-visualisation, scouting for locations (and knowing where the sun is going to be) I pretty much know exactly what I am going to shoot, therefore, far fewer images to process.
When you are sat in front of your PC post processing hundreds of images it is important to have a good efficient workflow. My process has developed quite a lot while following this course but I'm still hindered by the 80-20 rule, i.e. rejecting the poor images (80%) can be relatively quick but then deciding which of the 20% you are going to keep can take forever. Then there is the dilemma of keeping or deleting the rejects. I have (on several occasions) reviewed previous work and picked out images that were overlooked first time around. (Tip - regularly look through your previous work, it's great to see how much you have improved).
So, you've completed post processing and gone from 100 images to 10 but you only want to showcase 6 of them. "You'll be remembered by your weakest image so it is important that they are all top drawer", this is what I have been telling my self constantly as it is the first thing you will hear when researching "how to create a portfolio". It's great to get into this way of working and I'm quite comfortable now with my workflow and find it easy to discard unwanted images. However, there is a down side. When you spend so much time looking at your images you can start to get bored of them. Sounds strange but its true. By the time I had selected my final 6 images I was starting to doubt myself and the images and even thought about starting over.
This is where your confidence needs a little boost and the quickest way to do this is to have someone else look your images. So, I uploaded a few of them onto flickr and I didn't have to wait long before some positive comments appeared. Simple, problem solved. But as with all photographers you'll never capture the perfect image because once you do you want to get straight back out there and get a better one.
I was (without sounding modest) expecting a decent score as I put a lot of effort into the images and also the write up completed for each one. The 10/10 was very pleasing but again the detailed feedback was much more valuable to me.
The final assignment doesn't require submission but I will be completing it anyway and reporting back on here.
So that's it, I've completed the Photography Institutes' "Professional Photography Course".
Thank you for reading and I hope that you have found this useful.
Keith
Monday, 21 March 2011
Welshot Imaging - Photographic Academy
I recently became a member of the Welshot Photographic Academy based in the UK. I was introduced by a work colleague and after attending a couple of evening workshops I decided to join.
They have an expanding number of locations in the UK, the majority of which are in and around Wales. I am local to the Chester one so have attended a couple of workshops there. I'm also not far from the Llandudno one so I may try one of those evenings next. As well as evening workshops they also run activities covering anything from a 1/2 day street photography session to a 10 day trip to Hong Kong !
Anyone can attend the workshops (small fee) but there are plenty of benefits to joining up. It's also a great way to meet other people who share the same interest so you can swap experiences, hints & tips etc. What I do like is the fact that there is nothing competitive at all about this Academy. It doesn't matter what type of camera you have or how good you are, everyone pitches in and helps each other out.
If you've tried the old style camera clubs and they didn't meet your expectations/requirements then I suggest you give Welshot a try.
Visit their website for full details.... www.welshotimaging.co.uk
They have an expanding number of locations in the UK, the majority of which are in and around Wales. I am local to the Chester one so have attended a couple of workshops there. I'm also not far from the Llandudno one so I may try one of those evenings next. As well as evening workshops they also run activities covering anything from a 1/2 day street photography session to a 10 day trip to Hong Kong !
Anyone can attend the workshops (small fee) but there are plenty of benefits to joining up. It's also a great way to meet other people who share the same interest so you can swap experiences, hints & tips etc. What I do like is the fact that there is nothing competitive at all about this Academy. It doesn't matter what type of camera you have or how good you are, everyone pitches in and helps each other out.
If you've tried the old style camera clubs and they didn't meet your expectations/requirements then I suggest you give Welshot a try.
Visit their website for full details.... www.welshotimaging.co.uk
Thursday, 3 March 2011
TPI - Assignment 10
A lot of research and thinking required for this one. The more information you gather about running a photography business the more you realise that you'll probably only spend about 10% of the time behind the camera.
The marketplace is saturated with photographers all fighting for business. You've always got to stay one step ahead of the competition othewise you'll crash and burn.
So how do you make yourself stand out from the rest ? Just being a better photographer doesnt make you a successfull business. Marketing and product placement are key; if the right potential customers don't see your flyers/adverts etc in the right place at the right time then they are not going to use you.
Now i'd be happy to supplement my income by selling a few pictures here and there, it would certainly help pay for the next lens. So, if that were to happen and then develop into something more substantial it would still take an enormous amount of paid photo jobs to take me away from the 9 ot 5. I would need to be doing a couple of wedding a week and that is certainly not for the faint hearted.
There is also the enjoyment factor to consider. You take certain pictures because you like taking them. If you were doing this for a living then you would be taking certain types of pictures because you had to. Then your hobby is no longer your hobby and your enjoyment is replaced with satisfying the customer and doing what you are told.
Still, if I could take pictures all day and make enough money to survive I wouldn't hesitate to do so. You just never know whats around the corner......
The marketplace is saturated with photographers all fighting for business. You've always got to stay one step ahead of the competition othewise you'll crash and burn.
So how do you make yourself stand out from the rest ? Just being a better photographer doesnt make you a successfull business. Marketing and product placement are key; if the right potential customers don't see your flyers/adverts etc in the right place at the right time then they are not going to use you.
Now i'd be happy to supplement my income by selling a few pictures here and there, it would certainly help pay for the next lens. So, if that were to happen and then develop into something more substantial it would still take an enormous amount of paid photo jobs to take me away from the 9 ot 5. I would need to be doing a couple of wedding a week and that is certainly not for the faint hearted.
There is also the enjoyment factor to consider. You take certain pictures because you like taking them. If you were doing this for a living then you would be taking certain types of pictures because you had to. Then your hobby is no longer your hobby and your enjoyment is replaced with satisfying the customer and doing what you are told.
Still, if I could take pictures all day and make enough money to survive I wouldn't hesitate to do so. You just never know whats around the corner......
Wednesday, 16 February 2011
TPI - Assignment Results
These are my scores for each Assignment;
1) 8/10
2) 9/10
3) 10/10
4) 10/10
5) 9/10
6) 9/10
7) 9/10
8) 10/10
9) 9/10
10) 9/10
11) 10/10
12) ...in progress
1) 8/10
2) 9/10
3) 10/10
4) 10/10
5) 9/10
6) 9/10
7) 9/10
8) 10/10
9) 9/10
10) 9/10
11) 10/10
12) ...in progress
Monday, 7 February 2011
Time for a change
After 4 years of loyal service I have decided to upgrade from my Canon 400D. I don't want to sound like a workman blaming his tools but I have reached the stage were I need something new, something more up to date, something bigger, better, etc, etc.
After all, 4 years is a very long lifetime for a piece of technology. In fact, as with all gadgets I remember purchasing my 400D and then seeing the adverts for the 450D within days of placing the order.
Well the same thing has happened again. My new 60D arrived the other day and in typical fashion the 600D was announced...probably just as I pressed the "Purchase" button !
Not that it bothered me as I had spent a good few months reading reviews and taking time to make sure I was happy with my upgrade decision. In fact, "happy" is an understatement. Although I've only had the 60D for a few days and not had chance to get out and shoot with it, from what I have seen so far it is fantastic.
There are so many features I was lacking on the 400D and those that were there have been enhanced significantly. The 3 big selling points for me where;
1) Wireless Flash control
2) The LCD screen
3) ISO performance
I'm already finding more features to add to the list and no doubt once I manage to get out and about with the camera I will find even more.
HD Video - I didn't put this on my list of selling points because.....well, it wasn't ! not for me anyway. So this is where I contradict myself. I'm an amateur photographer and as such don't really take much video footage (even though I own a camcorder). I'm much more comfortable taking stills rather than video. That said, I do spend a lot of time watching HD video footage taken by other people, particularly of MTB and BMX riders. I have been amazed by the overall quality of the movies that are out there and certainly prefer to watch than to create.
So, to the contradiction.....having played with the HD functionality I can safely say that I am hooked. I've shot about 2 minutes of footage around the house and I love it already.
When I started looking at replacement cameras I was a bit put off by the fact that I would be paying for functionality I didn't want/need. But given that all the models in the running had HD functionality I resigned myself to that fact. Now I am even more pleased with my decision.
It's also worth mentioning that you should shop around for the best deals. If you are buying online then make sure you read reviews about the websites/companies. You may find some fantastic deals but you need to be confident that you are giving your money to a reputable business. I found a 60D for £100 less than anywhere else....bargain. Not so, the write-ups on the company where terrible.
Trade-in......purchasing on the High Street will give you the opportunity to trade-in your old camera. However, I opted for ebay. While researching replacement models I was also checking out ebay to see how much I could potentially get for my 400D. This was a key factor in the decision making as it helped bring the cost down. At the time of writing this my 400D has 21 watchers and just under 2 days left to go. There is one bid but the reserve hasn't been met yet. I'm confident I will get a decent price as I have seen over 20 of them sell for a decent price over the past couple of weeks.
Now, time to go and take some pictures...........
After all, 4 years is a very long lifetime for a piece of technology. In fact, as with all gadgets I remember purchasing my 400D and then seeing the adverts for the 450D within days of placing the order.
Well the same thing has happened again. My new 60D arrived the other day and in typical fashion the 600D was announced...probably just as I pressed the "Purchase" button !
Not that it bothered me as I had spent a good few months reading reviews and taking time to make sure I was happy with my upgrade decision. In fact, "happy" is an understatement. Although I've only had the 60D for a few days and not had chance to get out and shoot with it, from what I have seen so far it is fantastic.
There are so many features I was lacking on the 400D and those that were there have been enhanced significantly. The 3 big selling points for me where;
1) Wireless Flash control
2) The LCD screen
3) ISO performance
I'm already finding more features to add to the list and no doubt once I manage to get out and about with the camera I will find even more.
HD Video - I didn't put this on my list of selling points because.....well, it wasn't ! not for me anyway. So this is where I contradict myself. I'm an amateur photographer and as such don't really take much video footage (even though I own a camcorder). I'm much more comfortable taking stills rather than video. That said, I do spend a lot of time watching HD video footage taken by other people, particularly of MTB and BMX riders. I have been amazed by the overall quality of the movies that are out there and certainly prefer to watch than to create.
So, to the contradiction.....having played with the HD functionality I can safely say that I am hooked. I've shot about 2 minutes of footage around the house and I love it already.
When I started looking at replacement cameras I was a bit put off by the fact that I would be paying for functionality I didn't want/need. But given that all the models in the running had HD functionality I resigned myself to that fact. Now I am even more pleased with my decision.
It's also worth mentioning that you should shop around for the best deals. If you are buying online then make sure you read reviews about the websites/companies. You may find some fantastic deals but you need to be confident that you are giving your money to a reputable business. I found a 60D for £100 less than anywhere else....bargain. Not so, the write-ups on the company where terrible.
Trade-in......purchasing on the High Street will give you the opportunity to trade-in your old camera. However, I opted for ebay. While researching replacement models I was also checking out ebay to see how much I could potentially get for my 400D. This was a key factor in the decision making as it helped bring the cost down. At the time of writing this my 400D has 21 watchers and just under 2 days left to go. There is one bid but the reserve hasn't been met yet. I'm confident I will get a decent price as I have seen over 20 of them sell for a decent price over the past couple of weeks.
Now, time to go and take some pictures...........
Monday, 10 January 2011
TPI - Assignment 9
Now this was a tough one ! This assignment was packed with technical jargon, best practices, workflows, tutorials you name it. I've lost count of the amount of times I read through the notes, not to mention the re-visits to specific sections as I was completing the assignment.
One thing this course has taught me is that "no matter how much you think you know about something - you are way off the mark and know absolutely nothing" ! (well you know what I mean)
Every time I come across another topic, whether its sharpening or bit depth, in reality these subjects are huge in their own right. In fact, there are books written just about sharpening and you could spend hours researching the pro's and con's of 8 or 16 bit depth. Did you know that different applications use different sharpening algorithms to calculate which pixels should be altered and by how much ?
The images you spend so much time working on are going to end up somewhere. Whether it's the digital cupboard, an on-line sharing site or as a print above your fireplace the medium used to display your image is a key factor. All of the processing techniques you can apply in photoshop are either going to make or kill your image. You need to know where the image is intended for before you start manipulating it. An image displayed as a 6"x4" in a photo frame on your desk at work will need different processing to the image that is going to be printed as an A1 poster. In fact, not only the size of the reproduction but the distance it will be viewed from will be a factor to consider.
When you are processing images it is important to know from the outset where the image is going to end up. You then need to create an efficient workflow so that you don't spend all night processing images. For example, if you have a bunch of photos from a shoot and you apply some global changes in Camera Raw, chances are those edits will work across most of the pictures taken in that shoot. So, apply the changes to a whole batch of images and save yourself hours.
You can always make it even more interesting by printing your own images. So, why is that such an issue ? Well the colour scheme used to display an image on your screen is different to the one used to print it on your printer. There are tools you can use to test your printer to find out how good it is at reproducing your images so that they look like the one on the screen. Again, this is another topic filling books in its own right. That said, it is another fascinating aspect to photography.
One thing this course has taught me is that "no matter how much you think you know about something - you are way off the mark and know absolutely nothing" ! (well you know what I mean)
Every time I come across another topic, whether its sharpening or bit depth, in reality these subjects are huge in their own right. In fact, there are books written just about sharpening and you could spend hours researching the pro's and con's of 8 or 16 bit depth. Did you know that different applications use different sharpening algorithms to calculate which pixels should be altered and by how much ?
The images you spend so much time working on are going to end up somewhere. Whether it's the digital cupboard, an on-line sharing site or as a print above your fireplace the medium used to display your image is a key factor. All of the processing techniques you can apply in photoshop are either going to make or kill your image. You need to know where the image is intended for before you start manipulating it. An image displayed as a 6"x4" in a photo frame on your desk at work will need different processing to the image that is going to be printed as an A1 poster. In fact, not only the size of the reproduction but the distance it will be viewed from will be a factor to consider.
When you are processing images it is important to know from the outset where the image is going to end up. You then need to create an efficient workflow so that you don't spend all night processing images. For example, if you have a bunch of photos from a shoot and you apply some global changes in Camera Raw, chances are those edits will work across most of the pictures taken in that shoot. So, apply the changes to a whole batch of images and save yourself hours.
You can always make it even more interesting by printing your own images. So, why is that such an issue ? Well the colour scheme used to display an image on your screen is different to the one used to print it on your printer. There are tools you can use to test your printer to find out how good it is at reproducing your images so that they look like the one on the screen. Again, this is another topic filling books in its own right. That said, it is another fascinating aspect to photography.
Tuesday, 4 January 2011
TPI - Assignment 8
A very important assignment and although it didn't actually require any pictures it was an interesting process to go through. Deciding what type of equipment you require to support your hobby as a potential business venture and how to justify the expense is not easy. There are so many things to consider, purchase or lease etc, etc.
Once you start getting into the detail it's pretty clear to see that we're not dealing with Photography in general terms, the subject itself is too vast. Once you start looking at the various types of photography work out there each one has its own specific requirements. You can't generalise and just pick a body, a few lenses and some lights. You need to seriously consider a particular field that interests you and then get an idea of the type of equipment specific to that area.
Friday, 17 September 2010
TPI - Assignment 7
This was by far the best assignment of the course so far. What appeared to be a simple task when I first read it turned into an unexpected journey. Although I'm interested in photography I had never really studied the work of great photographers. Sure, I was familiar with some and during this assignment I began to realise how much of their work is out there for all to see.
I also had a long hard think about the type of photography that I really enjoy and want to pursue. This involved trawling through countless images on-line and in books and magazines (something which I do anyway). After a while I could see that there were certain images I was drawn to. I used a useful feature on flickr to collect images that I liked. The "gallery" option lets you create galleries made of images from other flickr users. I built up a collection of images over a period of time and after a while I could see a type, style, genre that I was drawn to more that others. If I'm honest I like taking all types of pictures so it was difficult to select one area to focus on, however, if I had the choice to be great at one area of photography it would be portraits.....and in particular, Black and white portraits.
The image I selected for Part A was one that I had seen before but never new much about it. Whenever I did a search for Black and White portraits it would always appear and would stand out more than any others on the screen. It was THE picture I had to copy. By coincidence I had borrowed a book from a friend at work and the photographer who's work I was going to copy was in there. What suprised me was that it was a photography I knew about. As an avid U2 fan since their early days I knew that they were almost always photographed by Anton Corbijn. It was only then that I found out that he made the image I was going to copy....small world. Like I said earlier, their work is everywhere and these days I find myself looking at images and trying to work out who's work it is. Over time I'm sure I'll get better at it.
Taking the image was an great experience too. At first I was trying to take the shot on my own but this was proving difficult. In the end I had to get help from my wife, so technically I didn't actually take the picture.
For the second part of the assignment I also focused on portraits and spent even more time searching through images in order to find a bunch of them that I was happy with.
Again, I was very pleased with my score but as always the comments from my tutor where much more important.
I also had a long hard think about the type of photography that I really enjoy and want to pursue. This involved trawling through countless images on-line and in books and magazines (something which I do anyway). After a while I could see that there were certain images I was drawn to. I used a useful feature on flickr to collect images that I liked. The "gallery" option lets you create galleries made of images from other flickr users. I built up a collection of images over a period of time and after a while I could see a type, style, genre that I was drawn to more that others. If I'm honest I like taking all types of pictures so it was difficult to select one area to focus on, however, if I had the choice to be great at one area of photography it would be portraits.....and in particular, Black and white portraits.
The image I selected for Part A was one that I had seen before but never new much about it. Whenever I did a search for Black and White portraits it would always appear and would stand out more than any others on the screen. It was THE picture I had to copy. By coincidence I had borrowed a book from a friend at work and the photographer who's work I was going to copy was in there. What suprised me was that it was a photography I knew about. As an avid U2 fan since their early days I knew that they were almost always photographed by Anton Corbijn. It was only then that I found out that he made the image I was going to copy....small world. Like I said earlier, their work is everywhere and these days I find myself looking at images and trying to work out who's work it is. Over time I'm sure I'll get better at it.
Taking the image was an great experience too. At first I was trying to take the shot on my own but this was proving difficult. In the end I had to get help from my wife, so technically I didn't actually take the picture.
For the second part of the assignment I also focused on portraits and spent even more time searching through images in order to find a bunch of them that I was happy with.
Again, I was very pleased with my score but as always the comments from my tutor where much more important.
Wednesday, 11 August 2010
TPI - Assignment 6
This should have been straight-forward and simple. This was the first assignment where I thought i'd be able to complete it in no time at all. This was why the alarm bells started ringing and I found my self asking the question, "what have I missed ?". After all, it can't be that easy so I must have missed something.
Lighting and portraits are things I have spent a lot of time on so I was really looking forward to getting some good shots. The only problem was that they had to be pictures of a man and a woman. So my favourite models (the kids) couldn't help me out here.
Throughout the course I have always taken new pictures rather that looked at my hard-drive for any previous shots that fit the criteria. I wanted to make sure that as I went through each assignment I applied the knowledge I had gained from the previous ones. This meant that for the portraits I wanted to make sure that everything was right, exposure, perspective, composition, dof, white balance, lighting and so on.
Although there were some trade-off's because I was pushed for time and couldn't take the pictures when and where I really wanted to.
So with all that in mind I finally got some portraits taken in natural light and artificial light. As always the feedback was much more important than the score (9/10). This is one of the many assignments that I want to re-visit as I know I can do better if I get a bit more time.
Lighting and portraits are things I have spent a lot of time on so I was really looking forward to getting some good shots. The only problem was that they had to be pictures of a man and a woman. So my favourite models (the kids) couldn't help me out here.
Throughout the course I have always taken new pictures rather that looked at my hard-drive for any previous shots that fit the criteria. I wanted to make sure that as I went through each assignment I applied the knowledge I had gained from the previous ones. This meant that for the portraits I wanted to make sure that everything was right, exposure, perspective, composition, dof, white balance, lighting and so on.
Although there were some trade-off's because I was pushed for time and couldn't take the pictures when and where I really wanted to.
So with all that in mind I finally got some portraits taken in natural light and artificial light. As always the feedback was much more important than the score (9/10). This is one of the many assignments that I want to re-visit as I know I can do better if I get a bit more time.
Friday, 11 June 2010
TPI - Assignment 5
Sunglasses - I was struggling with this assignment at the start and it took me a while to realise what the problem was. Then just by coincidence I happened to buy a new pair of sunglasses. While driving home from the shops with the new sunglasses on I was amazed at how much greener the grass was and how much bluer the sky was. The sunglasses have a orange tint and this was making my view of the world look completely different. I particularly liked the way the clouds were more prominent and that I could see more detail whereas without the glasses there was no real detail visible. Just for clarification, this assignment is all about Light & Colour.
This sunglasses moment sort of kick started the assignment off for me and I then set about re-reading the assignment several times over. There were also books recommended in the assignment which I have since bought.
So having got the enthusiasm back I set about taking some shots to use for the assignment. This was when things started to go down hill again. Although I had some images to play with I was not 100% happy with them but I'll blame that on the weather and the small windows of opportunity I had to get out and shoot. In fact, the next hurdle was to do with technology not taking pictures. The objective was to utilise channel mixing to produce a monochrome image. This is difficult when your software does not have that feature.
Gimp - Having read through some course documentation for help I found I was faced with 2 choices, 1. Purchase Photoshop CS4 or 2. Download the Gimp for free. You guessed it, with Gimp installed I started to play with the channel mixer and managed to get some fairly good results. Channel mixing can be quite difficult and I tried it on a lot of images to try and get a better understanding about how the Red, Green and Blue channels affect an image when they are manipulated. This was all well and good but I was still not at the point where I felt I had a good enough image to upload and write about.
CS5 - After all the fretting over this assignment I was rescued by Adobe. Just by coincidence they launched CS5 and there was a free 30 day trial on offer. Without hesitation I downloaded the trial and re-visited most of my images so I could use a real channel mixer on them. The difference was amazing, the application is so good it's untrue. I was able to process my final image, write up my findings and I got 9/10 for my efforts.
There's more - I also found out through this great group on flickr that as a student with the Photography Institute I was entitled to a student discount on Adobe products. When I say discount it's not like 10 or 20%, its closer to 80%, and for a product like CS5 this make a HUGE difference.
You guessed it, I now use CS5 extended which includes Bridge, mini-bridge and Camera Raw. Plus I also got a months subscription to lynda.com where there a tons of tutorials videos on Photoshop and a whole host of other products.
This was one of the most challenging and interesting assignments so far and I have learnt a great deal from it.
This sunglasses moment sort of kick started the assignment off for me and I then set about re-reading the assignment several times over. There were also books recommended in the assignment which I have since bought.
So having got the enthusiasm back I set about taking some shots to use for the assignment. This was when things started to go down hill again. Although I had some images to play with I was not 100% happy with them but I'll blame that on the weather and the small windows of opportunity I had to get out and shoot. In fact, the next hurdle was to do with technology not taking pictures. The objective was to utilise channel mixing to produce a monochrome image. This is difficult when your software does not have that feature.
Gimp - Having read through some course documentation for help I found I was faced with 2 choices, 1. Purchase Photoshop CS4 or 2. Download the Gimp for free. You guessed it, with Gimp installed I started to play with the channel mixer and managed to get some fairly good results. Channel mixing can be quite difficult and I tried it on a lot of images to try and get a better understanding about how the Red, Green and Blue channels affect an image when they are manipulated. This was all well and good but I was still not at the point where I felt I had a good enough image to upload and write about.
CS5 - After all the fretting over this assignment I was rescued by Adobe. Just by coincidence they launched CS5 and there was a free 30 day trial on offer. Without hesitation I downloaded the trial and re-visited most of my images so I could use a real channel mixer on them. The difference was amazing, the application is so good it's untrue. I was able to process my final image, write up my findings and I got 9/10 for my efforts.
There's more - I also found out through this great group on flickr that as a student with the Photography Institute I was entitled to a student discount on Adobe products. When I say discount it's not like 10 or 20%, its closer to 80%, and for a product like CS5 this make a HUGE difference.
You guessed it, I now use CS5 extended which includes Bridge, mini-bridge and Camera Raw. Plus I also got a months subscription to lynda.com where there a tons of tutorials videos on Photoshop and a whole host of other products.
This was one of the most challenging and interesting assignments so far and I have learnt a great deal from it.
Wednesday, 31 March 2010
TPI - Assignment 4
Well this one took me ages to complete, not because I was being lazy (well maybe) but because it required some outdoor shots in various lighting conditions. Living in the UK we usually only get one type of light outside....dull grey, so while I tried to arrange stuff so that I could go out and take pictures it was usually a non-starter as the conditions were never any good.
Then finally it came, we had a good weekend last week and I was able to get out on Saturday morning. (Which was good because since then we have had rain, hail and snow !)
Taking the pictures was very rewarding as I was making use of other things I have learned in the previous assignments. Additionally, I had a new tripod to use which made life so much easier.
My objectives for this shoot were to get the images required for the assignment and to also get a nice landscape image.
Overall I have learned a lot more about histograms and how to read them. The course notes don't go into a great detail about histograms but that is what the assignment is for (pratical is so much better than theory). I would say though that the material it does cover is very useful to know and I have again learned a great deal from it.
Let's hope the score at least meets my expectation.
Then finally it came, we had a good weekend last week and I was able to get out on Saturday morning. (Which was good because since then we have had rain, hail and snow !)
Taking the pictures was very rewarding as I was making use of other things I have learned in the previous assignments. Additionally, I had a new tripod to use which made life so much easier.
My objectives for this shoot were to get the images required for the assignment and to also get a nice landscape image.
Overall I have learned a lot more about histograms and how to read them. The course notes don't go into a great detail about histograms but that is what the assignment is for (pratical is so much better than theory). I would say though that the material it does cover is very useful to know and I have again learned a great deal from it.
Let's hope the score at least meets my expectation.
Friday, 12 March 2010
TPI - Assignment 3
Certainly the most difficult/interesting assignment so far. What I really mean is that this is one area of photography that I hadn't studied previously in any detail. Metering was something I just left to the camera to sort out but there is so much more control you can take by chosing the right type of metering.
I found the Zone System very intersting and whole concept of 18% grey has (I think) finally clicked.
That said I'm sure I'll revisit this topic from time to time and realise that I haven't got it nailed at all yet !
I found the Zone System very intersting and whole concept of 18% grey has (I think) finally clicked.
That said I'm sure I'll revisit this topic from time to time and realise that I haven't got it nailed at all yet !
Subscribe to:
Posts (Atom)